A Complete Guide to Mounting Motors and Essential Accessories

You want a guide that makes mounting motors easy and safe. Many people have trouble with things like misalignment, vibration, and bearing wear when mounting. These problems often happen because surfaces are not even or parts are loose. If you use the right mounting techniques, you keep your equipment safe and help it work better. A good guide helps you avoid mistakes and makes you feel sure. With the right steps, mounting motors gets easier and works better.
Key Takeaways
Follow the correct mounting steps to keep motors safe. This helps lower vibration and makes motors last longer. - Pick the right accessories like mounts, isolators, and alignment tools. These make installing motors easier and more dependable. - Use tools like laser kits to check motor alignment carefully. This stops noise, wear, and damage from happening. - Look at mounts and fasteners often to find problems early. This helps you avoid expensive repairs later. - Choose mount types and materials that fit your motor’s needs. Make sure they also work well in your motor’s environment for best safety and performance.
Mounting Motors: Essentials
Key Steps
When you mount motors the right way, you stop problems like vibration and noise. You also help the motor last longer. It is important to use a clear guide so your work is safe. Here are the main steps you need to follow for mounting motors:
Check all motor mounts before you begin. Look for cracks or damage. If a mount looks weak, replace it.
Put the motor on a flat, strong base. A thick steel baseplate is best. Make sure all mounting spots are even. This keeps the motor from bending or getting out of line.
Pick the correct mounting bolts. Do not tighten them all the way yet. Leave them a little loose so you can move the motor if needed.
Line up the motor with the equipment it will run. Use a spirit level to check both ways. If the motor is not flat, put shims under it until it is.
Make sure there is no space between the mounts and the base. The motor should not wiggle or tip.
After you check the alignment, tighten all bolts. Make sure they are tight so the motor does not move when running.
Look at the mounting surface. If it is concrete, check for cracks or damage. If you see any, use coatings that resist chemicals.
Follow safety rules like NEMA MG2 and OSHA. Use safe lifting and disconnect couplings to keep things safe.
Think about where the motor will be used. Pick the right enclosure for air flow and safety.
Use vibration isolation if needed. Resilient mounts or cushion bases help lower noise and shock.
Tip: Check your motor mounts often after you install them. Early checks help you find problems before they get worse.
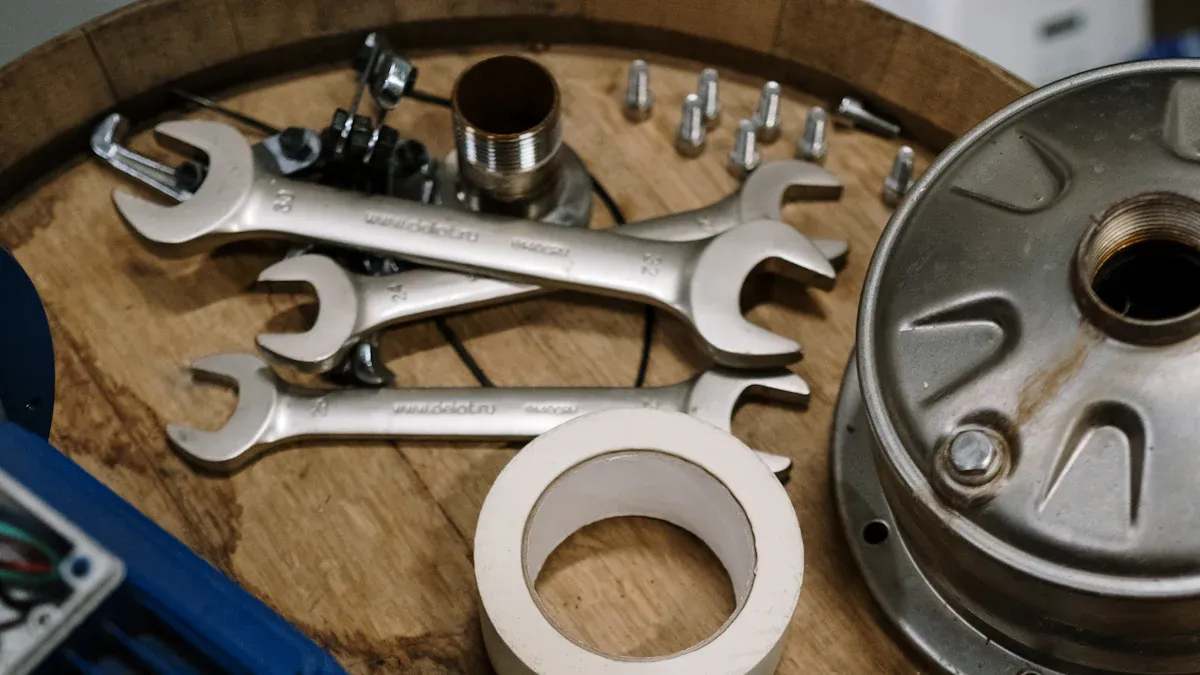
Must-Have Accessories
You need the right accessories to make mounting easier and safer. These items help hold the motor, cut down on vibration, and keep your equipment safe.
Motor mounts and bases: These keep the motor in place. They come in many sizes and materials for different jobs.
Stabilizer bushings: These are made of rubber or polyurethane. They lower vibration and give extra support. They also help stop noise and protect the frame.
Coupling kits: These join the motor to other parts, like gearboxes or shafts. A good coupling makes things run smoothly.
Shaft grounding rings: If you use variable frequency drives, these rings keep stray currents away from motor bearings. They help stop early bearing problems.
Shaft coatings and grounding straps: These help with electrical contact and stop rust. They also give stray currents a safe way to go to ground.
Shims and spacers: Use these to make the motor level when you install it. They help you line things up just right.
Fasteners and hardware: Always use the right bolts, washers, and nuts. Good hardware keeps the motor steady.
Alignment tools: Tools like spirit levels and laser kits help you set up the motor the right way.
Isolator kits: These have pads or feet that soak up vibration and shock. They protect the motor and the surface it sits on.
Note: The right accessories make installation easier. They also help your motor last longer and need less fixing.
A good guide will remind you to check all these accessories before you start. When you use the right mounts and tools, mounting motors is safer and works better.
Why Proper Mounting Matters
Safety and Stability
If you install engine mounts the right way, you stay safe. Your equipment is also safer. A tight mount keeps the engine from moving or dropping. If you skip good mounting, you might hear odd sounds. These can be clunks or bangs when you speed up or slow down. Sometimes, the engine can move a lot and hurt wires or hoses. In bad cases, poor mounting can cause accidents or broken parts.
You need to check each engine mount to make sure it is tight. Good mounting stops the engine from shaking too much. Using the right mount and hardware keeps the engine in place. For high-torque motors, a strong mount and the right torque arm direction help. This setup sends forces into the frame safely. It stops the axle from slipping and keeps the engine steady, even with heavy loads.
A good engine mount works like a shield. It cuts down on shaking and keeps your engine safe from quick moves.
Performance and Longevity
Mounting the right way does more than keep things safe. It helps your engine work better and last longer. When you line up the engine and mount, you lower friction and heat. This means less wear on bearings and other parts. If water or dirt gets in the mount area, it can hurt the engine’s bearings and windings. Good mounting and drainage stop these problems early.
You can use tools like laser alignment kits to check your engine mount. Regular checks and care, like looking at alignment and oil, help your engine last longer. Good mounting also means less shaking, so the engine runs smooth and quiet. Studies show that the mount’s design and quality change how much noise and shaking you get. A strong, well-made mount keeps the engine quiet by stopping shaking at the start.
Benefit of Proper Mounting | How It Helps Your Engine |
|---|---|
Reduces vibration | Less wear and tear |
Improves alignment | Better performance |
Prevents moisture damage | Longer engine lifespan |
Lowers noise | Quieter operation |
When you focus on mounting and pick the right engine mounts, you protect your money and keep your equipment working well.
Engine Mounts and Types
Engine mounts connect the engine to the frame. They keep the engine steady and safe. Their job is to hold the engine, stop vibrations, and lower noise. Picking the right engine mounts makes rides smoother and protects parts. It also helps your equipment last longer. There are many engine mount designs. They use special materials and shapes for cars, factories, and boats.
Rubber Mounts
Rubber mounts are the most common type. They use rubber to soak up shocks and stop vibrations from reaching the frame. This helps keep things quiet and smooth. Rubber engine mounts give both comfort and support. They work well in cars, trucks, and small machines. You might see natural rubber, neoprene, or silicone used. Natural rubber fights tearing and water. Neoprene stands up to oil and heat. Rubber mounts cost less and are easy to put in. But they can wear out faster if used hard or in bad weather.
Tip: Check rubber engine mounts often. If you see cracks or feel more shaking, replace them soon.
Hydraulic Mounts
Hydraulic mounts use rubber and fluid chambers together. The fluid helps block vibrations, even at different speeds. These mounts are best for strong cars, trucks, and boat engines. Hydraulic engine mounts can handle heavy loads and hot or cold weather. They also resist water, chemicals, and sunlight. You find them where strong vibration control is needed.
Specification | Rubber Mounts | Hydraulic Mounts |
|---|---|---|
Vibration Isolation | Good | Superior |
Load Capacity | Moderate | High |
Environmental Resistance | Moderate | Excellent |
Cost | Lower | Higher |
Active Mounts
Active mounts use smart tech to fight engine vibrations. They have sensors and parts that sense movement and push back. This engine mount design changes itself as the engine runs. You get less shaking and noise, even when the engine speeds up or slows down. Active engine mounts are used in fancy cars, race cars, and new electric cars. They help stop vibrations that other mounts cannot.
Active mounts use smart materials and hydraulic parts.
They make rides smoother and protect the frame from engine force.
These mounts cost more but give the best control over noise and shaking.
Custom and Composite Mounts
Custom and composite mounts fix special problems. You might need a custom engine mount for tight spots or odd shapes. Custom mounts use strong metals and special designs to fit your engine and frame. Composite mounts use tough plastics with glass fibers. These motor mounts are light and stop high-frequency vibrations from electric motors. Composite mounts also weigh less and cost less, so they are used in electric cars and planes.
Custom mounts fit your engine and frame just right.
Composite mounts handle heat and last a long time.
Both types of motor mounts help stop shaking and noise in hard places.
Note: Always pick an engine mount design that matches your engine and where you use it. This keeps your engine safe and your ride smooth.
Electric Motor Mounting Types
When you work with electric motor mounting, you should know the main types. Each mount has its own job and fits different machines. You can find the right mount by checking codes from groups like NEMA and IEC. These rules make sure mounts fit well and are safe for many machines.
Foot Mounts
Foot mounts are the most common type you will see. You bolt the motor to a flat base using feet on the bottom. This spreads the weight along the motor’s length. The design is simple and easy to put in. You need to line up the motor carefully to stop uneven wear. Foot mounts are good for machines that need steady support and easy access.
Mount Type | Installation Method | Load Distribution Characteristics |
|---|---|---|
Foot Mount | Bolted to a flat base with feet under the motor. | Spreads force along the motor’s length; lowers bending and stress; simple design; needs careful alignment to stop uneven wear. |
Flange Mounts
Flange mounts use a strong ring or plate at the end of the motor. You bolt this flange to the machine frame. This gives a tight and stable fit. Flange mounts can handle heavy loads and strong forces better than foot mounts. You often see flange mounts in pumps, fans, and gearboxes that need strong support.
Mount Type | Installation Method | Load Distribution Characteristics |
|---|---|---|
Flange Mount | Uses a strong flange at the end or middle; bolts to the machine frame. | Gives a strong and steady connection; handles heavy loads well; better stability and load strength than foot mounts. |
End Mounts
End mounts let the motor move or pivot a little. You use clevis or rod eye mounts at the ends. These mounts help when you need some flexibility. End mounts do not hold heavy loads as well as other types. They are good if your machine moves or shakes. You might use end mounts in small tools or light machines.
Mount Type | Installation Method | Load Distribution Characteristics |
|---|---|---|
End Mount | Uses clevis or rod eye mounts for pivoting or angle movement. | More flexible and less stiff; helps with misalignment; not for heavy loads; gives flexibility but less load support. |
Combined Designs
Some machines need more than one mounting style. Combined electric motor mounting uses both foot and flange mounts or other mixes. This helps you get the best fit for tricky machines. You can line up the shaft better, lower vibration, and keep the motor cool. Combined mounts also save space and handle more torque. You get a safer, quieter, and longer-lasting machine.
Tip: Always check NEMA or IEC codes before you put in electric motor mounts. These codes help you pick the right mount and make sure it fits well.
You can find pictures and diagrams in NEMA and IEC manuals. These guides show where to put each mount and how to check your work. If you follow these steps, you avoid mistakes and keep your electric motor mounting safe and strong.
Accessories for Mounting Motors
Support Brackets
Support brackets help you keep your motor in the right place. These brackets hold the motor steady and connect it to the frame. When you use strong support brackets, you reduce vibration and stress on your motor mounts. This keeps your motor aligned and stops it from moving around. You also make your mounting system last longer. Support brackets let you set up your motor quickly and keep it stable, even if you need to check or adjust it later.
Isolator Kits
Isolator kits help you control vibration during mounting. These kits often have spring or neoprene isolators that soak up shocks. You can use isolator kits to make your motor run more quietly. They also protect your motor mounts from too much shaking. Some kits come with springs, brackets, caps, and hangers. You can mount your motor in different ways, like on the top, bottom, or side. This flexibility helps you get the best vibration control for your setup.
Isolator kits dampen mechanical vibrations.
They help your motor mounts last longer by reducing stress.
You get quieter operation and less wear on your mounting system.
Fasteners and Hardware
You need the right fasteners and hardware for safe mounting. Bolts, washers, and locknuts hold your motor mounts tight. Using a complete hardware kit makes sure your motor stays in place. Always pick hardware with corrosion-resistant finishes to protect against rust. For heavy-duty mounting, use high-strength fasteners. The table below shows which grades work best:
Fastener Strength Level | Common Grades (inch) | Common Property Classes (metric) | Application Notes |
|---|---|---|---|
Low strength | Grade 2 | Property Class 4.6 | Not recommended for heavy-duty motor mounting due to insufficient strength |
Medium strength | Grade 5 | Property Class 8.8 | Suitable for general applications but less ideal for heavy loads |
High strength | Property Class 10.9 | Recommended for heavy-duty motor mounting due to superior tensile strength and durability | |
Really high strength | N/A | Property Class 12.9 | Used in high-performance or racing applications with very high tensile strength requirements |
Alignment Tools
Alignment tools help you set up your motor mounts with precision. You can use a straightedge, feeler gauge, or a laser alignment tool. These tools help you line up your motor and prevent misalignment. When you use alignment tools, you lower vibration and noise. You also protect your bearings and couplings from early wear. Laser alignment tools make the job faster and easier, even if you do not have much experience.
Use alignment tools to check shaft position.
Follow the right bolt tightening pattern.
Check alignment after the motor heats up.
Adjust as needed to keep your mounting system working well.
Tip: Good alignment keeps your motor mounts from wearing out too soon.
Shims and Spacers
Shims and spacers help you level your motor during mounting. Shims fill small gaps and help you get the right height. Spacers keep parts apart and hold them steady. You should use no more than four shims in a stack. Too many shims can make your mounting unstable. Always clean shims and surfaces before you install them. Use a torque wrench to tighten bolts and check alignment after you finish.
Use shims to fix uneven surfaces.
Sandwich thin shims between thicker ones for better support.
Check and adjust shims during regular maintenance.
Note: The right shims and spacers keep your motor mounts stable and help your mounting last longer.
Guide to Choosing Mounts and Accessories
Assessing Motor and Application
When you start with any mounting project, you need a clear guide to help you choose the right engine mounts and motor mounts. Begin by matching the motor type to your application. Think about speed control, torque, and how much power you need. You should also look at the load the engine will handle. Check if your setup needs steady power or if it will start and stop often. The environment matters too. Some engines work in hot, wet, or dusty places, so you must pick mounts that can handle these conditions.
Here is a simple checklist to guide your choice:
Match the motor type to your needs for speed, torque, and efficiency.
Check the load and how the engine will run—steady or with lots of stops.
Look at the space you have for mounting.
Make sure the mounts fit your safety and maintenance needs.
Plan for cooling and protection from dirt or water.
A good guide helps you avoid mistakes and keeps your engine running well.
Load and Vibration Factors
Load and vibration play a big role in choosing engine mounts and motor mounts. When your engine runs, it creates vibrations and shocks. The right mounts absorb these forces and protect your engine. Rubber mounts work well for most street engines because they reduce noise and shaking. Polyurethane mounts are stiffer and handle more power, but you may feel more vibration. Solid mounts give the best power transfer but can make the ride rough and noisy. You should not mix different mount types, as this can cause problems.
Mounts must balance vibration control and engine stability. If you use the wrong mounts, your engine may wear out faster or lose performance. Always match the mount material and design to your engine’s needs.
Material and Compatibility
The material of your engine mounts and motor mounts must match your engine and where you use it. For engines in hazardous places, like gas plants or mines, you need mounts made from strong materials such as cast iron. These mounts often have special coatings and insulation to keep your engine safe. Some motors need enclosures that keep out dust or water. Always check for safety ratings and certifications like UL or ATEX.
Environment | Recommended Mount Material | Special Features |
|---|---|---|
Wet or dusty | Cast iron, sealed mounts | IP55 protection, cooling fans |
Hazardous (gas, dust) | Flameproof, insulated | Explosion-proof, certified |
High temperature | Silicone, EPDM | Heat resistance |
Choose mounts that fit your engine, your environment, and your safety needs. This guide will help you get the best performance and longest life from your engine.
Step-by-Step Guide: Mounting Motors
Mounting a motor the right way helps you avoid problems and keeps your equipment running smoothly. This step-by-step guide will walk you through each part of the process. You will learn how to prepare, position, secure, and check your motor for a safe and reliable installation.
Preparation
Before you start, you need to get ready. Good preparation makes the rest of the installation easier and safer. Follow these steps to set up for mounting:
Read the manufacturer's instructions for your motor model. These instructions give you important details for your installation guide.
Make sure the motor fits your application. Check the size, power, and type.
Pick a spot that is easy to reach, safe, and has good airflow.
Check that your power supply matches the motor’s voltage and current needs.
Choose the right mounting method, such as foot or flange, based on your motor and job.
Gather the correct hardware. Clean the surface where you will mount the motor. Make sure it is flat and strong.
Use the torque values from the manufacturer when you tighten bolts.
Plan for alignment. Get tools like a straightedge, feeler gauge, or laser alignment kit.
Set up your wiring. Follow safety codes and make sure you have the right wire size and grounding.
Check that nothing blocks the motor’s vents. Good cooling keeps your motor safe.
Test the setup before you finish. Make sure the motor turns the right way and runs smoothly.
Write down the installation details and plan for regular checks.
Tip: Careful preparation saves time and helps you avoid mistakes during mounting.
Positioning and Alignment
You need to place your motor in the right spot and line it up with the equipment it will drive. Good alignment stops vibration and wear. Here are the main alignment techniques you can use:
Straight Edge and Feeler Gauge Method: Place a straightedge across the motor and driven shaft. Use feeler gauges to check for gaps. This method works well if you have experience.
Dial Indicator Method: Attach a dial indicator to the shaft. Turn the shaft and watch for changes. This method gives you precise measurements but takes more time.
Laser Alignment Method: Use a laser tool to check alignment. The laser shows you if the shafts are lined up. This method is fast, easy, and very accurate.
Laser alignment tools have become the gold standard. They help you get the best results with less effort. Good alignment keeps your motor and equipment running longer and quieter.
Alignment Method | Tools Needed | Skill Level | Accuracy |
|---|---|---|---|
Straight Edge/Feeler | Straightedge, gauges | Medium | Good |
Dial Indicator | Dial indicator | High | Very Good |
Laser Alignment | Laser tool | Low | Excellent |
Note: Always check alignment after you tighten bolts. Even small shifts can cause problems.
Securing the Motor
Once you have the motor in place and lined up, you need to secure it. This step keeps the motor from moving or shaking during use.
Use the right bolts, washers, and nuts for your mounting method.
Tighten bolts in a crisscross pattern. This spreads the force evenly.
Follow the torque values from the manufacturer. Too much force can damage the mount. Too little can let the motor slip.
Check that the motor sits flat on the base. If you see gaps, use shims to fill them.
Make sure the mount holds the motor steady but does not bend it.
Attach any support brackets or isolator kits if your installation needs them.
Tip: Double-check all fasteners before you move to the next step. A loose bolt can cause big problems later.
Final Checks
After you finish mounting and securing the motor, you need to inspect your work. This final step helps you catch any issues before you start the motor.
Look for any damage from shipping or handling.
Remove all covers or packing materials from the motor.
If you stored the motor before installation, check for signs of vibration or moisture.
Drain any oil that was added for shipping.
Make sure the motor sits on a firm, flat surface.
Check the alignment of couplings and belts. Follow the manufacturer's tolerances.
Open any condensation drains at the lowest points.
Confirm that nothing blocks the motor’s ventilation.
Check the lubrication system. Add grease if needed, but do not overfill.
For horizontal motors, check for soft foot conditions. Use shims to fix any uneven spots.
For vertical motors, make sure the shaft and coupling are within the right limits.
Review the manuals for any special installation requirements.
✅ A careful final inspection helps you avoid costly repairs and keeps your motor running safely.
This step-by-step guide gives you the tools and knowledge you need for a successful mounting. When you follow each step, you make your installation safe, strong, and ready for years of use.
Common Mistakes
Wrong Accessory Choice
You might think any accessory will work for your motor, but this is not true. Using the wrong parts can cause big problems. For example, if you pick bolts that are too short or weak, your motor may come loose. If you use the wrong type of isolator, you may not get enough vibration control. Always check the size, material, and rating of each accessory before you start mounting. Read the manufacturer’s guide and match each part to your motor and application.
Tip: Make a checklist of all needed accessories before you begin. This helps you avoid last-minute mistakes.
Poor Alignment
Many people rush through alignment, but this step is very important. If you do not line up the motor and driven equipment, you can cause extra wear and noise. Poor alignment leads to vibration, heat, and even broken parts. You should use tools like a straightedge or a laser alignment kit to check your work. Take your time during mounting and double-check the alignment after tightening the bolts.
Problem from Poor Alignment | What You Might Notice |
|---|---|
Extra vibration | Shaking or rattling sounds |
Fast bearing wear | Hot spots or leaks |
Coupling failure | Sudden stops or jerks |
Ignoring Vibration Control
You may think vibration is normal, but too much can damage your motor and equipment. If you skip vibration control during mounting, you risk early failure. Always use isolators, pads, or bushings when needed. These parts help absorb shocks and keep your system running smoothly. Check for signs of vibration after you finish mounting. If you feel shaking or hear odd noises, stop and fix the problem right away.
Remember: Good vibration control keeps your motor safe and helps it last longer.
Maintenance and Troubleshooting
Inspection Tips
Check your engine mounts often to keep your engine safe. Look for cracks, loose bolts, or worn rubber. Use a flashlight to see under the engine and around each mount. If you see oil leaks near the mounts, the rubber might be breaking down. When you install mounts, always check that every bolt is tight. Use a torque wrench to follow the manufacturer's guide. Write down each inspection in a logbook. This helps you remember when you last checked and plan for engine mount replacement.
Tip: Check your mounting system after every 500 hours of engine use or at least twice a year.
Signs of Mounting Issues
There are some clear signs when your mounting system has problems. If you hear clunking or banging when the engine starts or stops, check the engine mounts right away. Too much vibration or shaking means the mounts might have failed. Look for engines that sag or tilt, which shows the mounts cannot hold the weight. If you see cracks in the rubber or metal, plan for engine mount replacement soon. Bad mounting can also make belts or hoses wear out faster. Always fix these problems quickly to keep your engine working well.
Symptom | Possible Cause |
|---|---|
Loud noise | Loose or broken mount |
Extra vibration | Worn or failed mount |
Engine misalignment | Damaged mounting system |
Addressing Noise and Vibration
You can lower noise and vibration by checking your mounting system during installation and regular maintenance. Use isolator pads or bushings to soak up shocks. Make sure the engine sits flat and level on the mounts. If you still hear noise, check for loose bolts or missing shims. Sometimes, you need engine mount replacement if the mounts have lost their shape or strength. Good mounting helps your engine run smoother and work better. Always follow the manufacturer's instructions for installation and replacement. This keeps your engine safe and helps it last longer.
Remember: Fix mounting problems quickly to keep your engine running well and protect your investment.
When you use the right mounting methods and accessories, your motor works better and is safer. A simple guide helps you not make mistakes and feel sure when you install the motor. Always follow each step in the guide and check what you do. Checking your system often keeps it working well for a long time. If your setup is hard, use a trusted guide or ask an expert for help.
FAQ
What is the best way to mount trolling motors on a kayak?
You should follow a step-by-step guide for mounting. Many people use a diy kayak motor mount for flexibility. Always check the types of kayak motor mounts before you start. This helps you pick the right one for your trolling setup.
How do you choose the right trolling motor for kayak motors?
You need to look at the size of your kayak and the weight it will carry. A good guide will help you match trolling motor power to your needs. Most kayak motors work best with lightweight trolling models.
Can you use trolling motors on all kayaks?
You can use trolling motors on most kayaks. Some kayaks need special mounts. Always check your kayak’s design. Many kayak motors fit well with a simple guide. You may need to adjust your setup for the best trolling results.
What accessories do you need for kayak motors and trolling setups?
You need a strong mount, battery, and wiring. Many guides suggest using support brackets and isolator kits. Trolling setups often need extra hardware. Always check your guide for the right parts for kayak motors.
How often should you check your trolling motor mount?
You should check your trolling motor mount before every trip. Look for loose bolts or worn parts. A good guide will remind you to inspect your kayak motors often. Regular checks keep your trolling setup safe and working well.
See Also
A Comprehensive Overview of Mini Motors and Their Uses
Understanding Vibration Motors: Varieties, Uses, and Choosing Tips
Small SMD Vibration Motors Explained for Product Engineering Experts
Mastering The Interpretation Of Motor Diagrams Step By Step
Exploring Rotating Motors: Varieties, Uses, And Selection Guidelines
Get Custom Micro DC Motors from
INEED Motors!
Leading Brand in Vibration Motor Manufacturing Industry