How to Perform Essential DC Motor Testing for Reliable Operation

In today's industrial society, DC motors play an important role in the background - they provide power support for various equipment ranging from factories to hospital ventilation systems. Last year, the market size of DC motors reached 25 billion US dollars. Their reliability is not only convenient and practical, but also crucial for business operations.
"Here are the actual situations we have learned from the maintenance work of thousands of engines: "
Electrical faults occur silently - they cause 45% of the failures, and often there are warning signals.
Just a 10-minute test can reveal problems that, if not addressed, may cause production to halt for several days.
And the best part? You don't need an engineering degree - just some basic tools and our step-by-step guidance methods will do.
Whether it's maintaining food processing equipment or robotic arms, regularly checking the motors is like getting a flu vaccine - this small measure can prevent major problems in the future.
Key Takeaways
Regular DC motor testing prevents costly failures and keeps equipment safe by catching problems early.
Perform key tests like visual inspection, resistance measurement, insulation resistance, and functional load tests for a full motor health check.
Use the right tools, such as a multimeter and insulation tester, and always follow strict safety steps to avoid electrical hazards.
Record and compare test results over time to spot trends and decide when to repair or replace the motor.
Combining simple checks with advanced tests ensures your motor runs efficiently and lasts longer.
DC Motor Testing Basics
Key Tests Overview
When you start dc motor testing, you use several main types of tests. Each test checks a different part of the motor’s health. Here are the most common tests you will perform:
Visual Inspection: You look for signs of wear, damage, or contamination on the motor’s exterior and wiring.
Resistance Test: You measure the resistance of the windings. Measuring resistance of a brushed dc motor helps you find open circuits or shorted coils.
Insulation Resistance Test: You check the insulation between windings and the motor frame. This test uses a high voltage to see if current leaks through the insulation.
Functional Test: You run the motor to see if it starts, runs smoothly, and responds to controls.
Load Test: You operate the motor under normal working conditions to check its performance and efficiency.
Tip: When testing a dc motor, always record the current at each step. This helps you spot trends and plan maintenance.
You may also use advanced tests, such as the DC hipot step voltage test. This test increases voltage in steps and measures current at each level. It helps you find insulation problems before they cause failure. Modern testers can detect arcs and shut down automatically to protect the motor.
Test Type | Description | Acceptance Criteria |
|---|---|---|
Drop Testing (Fields) | Measures voltage drop to find shorted coils. | ±5% variation from average voltage drop. |
Compound Field Polarity | Checks if field coil polarities are correct. | Positive voltmeter deflection means correct polarity. |
Brushholder Spacing | Measures brush spacing around the commutator. | Maximum allowed variation: 1.2 mm. |
Setting Neutral | Adjusts brush position for minimal induced voltage. | Induced AC voltage should be less than 0.01 volts. |
Two-Way Run Test | Runs motor in both directions to verify neutral setting. | Performance should match in both directions. |
Why Test a DC Motor
Testing a dc motor keeps your equipment safe and reliable. You catch problems early, such as insulation breakdown or high current draw. When you test a dc motor, you prevent unexpected failures and costly repairs. Testing dc motors also helps you track performance over time. You can see if current readings change, which may signal contamination or weakening insulation. By following these steps, you make sure your motor runs efficiently and lasts longer.
Tools and Safety
Required Equipment
You need the right tools to test a DC motor safely and accurately. Start by gathering basic items such as a digital multimeter, insulation resistance tester, and a set of screwdrivers. For more advanced testing, industry sources recommend specialized equipment like inertial dynamometers, hysteresis brake dynamometers, and regenerative dynamometers. These devices help you measure torque, speed, current, voltage, and efficiency across a wide range of speeds—sometimes up to 60,000 rpm.
A standardized data sheet, such as the EASA DC Machine Data Sheet, helps you record all important motor details. This form aligns with ANSI/EASA AR100 standards and supports thorough documentation. You should also have a notebook or digital device to track test results and trends over time.
Tip: Always check that your test instruments are calibrated and in good working order before starting any test.
Here is a quick checklist of essential equipment:
Digital multimeter
Insulation resistance tester
Screwdrivers and hand tools
Motor testers (for advanced diagnostics)
Data recording sheet or device
Safety Precautions
You must follow strict safety steps when testing DC motors. These steps protect you and your equipment from electrical hazards. Technical manuals and industry standards recommend the following precautions:
Disconnect all wired connections between the motor and the DC battery.
Inspect for exposed or uninsulated wires.
Confirm that no DC voltage remains on any part of the equipment.
Use a working voltage tester to check for live power on the motor leads.
Attach test lead clips to the correct motor leads.
Select the right test on your instrument.
Connect instrument test leads properly before starting.
Follow all on-screen instructions for your tester.
Always consult the motor manufacturer’s manual for correct procedures.
You reduce risk by following these steps every time you test a motor. Never skip safety checks, even when using a multimeter for basic measurements.
How to Test a DC Motor
Visual Inspection
Start your dc motor testing with a thorough visual inspection. This step helps you spot obvious problems before you move to electrical tests. Look for dust, oil, or debris on the motor housing. Check for loose bolts, damaged wires, or signs of overheating like discoloration or burnt smells. Examine the terminal box for tightness and proper sealing. Inspect the brushes and commutator for wear or pitting.
Use a flashlight to check for cracks or corrosion.
Make sure all mounting bolts are secure.
Look for signs of moisture or rust.
Note: Visual inspections alone cannot detect all electrical faults. Combine this step with electrical tests for a complete assessment.
You should also verify that the motor is clean and properly earthed. If you find any loose or corroded connections, address them before you continue. Visual inspection results often match findings from electrical tests like insulation resistance or continuity testing. This combination increases your chances of catching early faults.
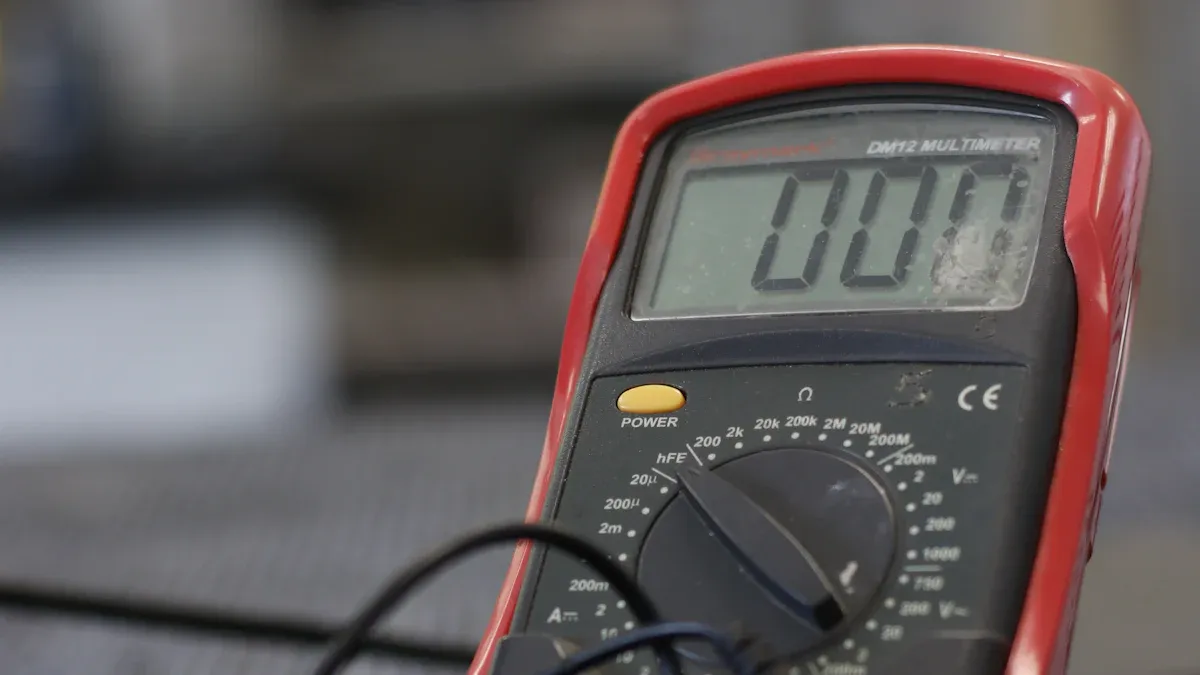
Testing a DC Motor Using a Multimeter
You can test a dc motor using a multimeter to check winding resistance, voltage, and continuity. Begin by disconnecting the motor from all power sources. Record the motor’s nameplate details, including voltage and current ratings.
Set your multimeter to resistance (ohm) mode.
Measure the resistance between the armature terminals. Healthy windings show low resistance, usually a few ohms. High or infinite resistance means broken or shorted coils.
Switch to continuity mode. Test between each terminal and the motor frame. You should not hear a beep or see a low reading. If you do, the winding may be shorted to the frame.
Set the multimeter to voltage mode. Power the motor and measure the voltage across the motor terminals. The reading should match the supply voltage. If you measure the motor voltage and it is much lower, you may have a wiring or winding problem.
Tip: Measuring resistance of a brushed dc motor is easier on smaller motors. Large motors may need more advanced tests.
If you find abnormal readings, such as high resistance or no continuity, you may need to repair or replace the motor. Always record your results for future comparison.
Insulation Resistance Test
The insulation resistance test checks if the windings are properly insulated from the motor frame. This step prevents dangerous current leaks and ensures safe operation.
Disconnect all cables and remove carbon brushes before you start.
Use a 500V insulation resistance tester (megger test). Place one lead on the commutator and the other on the motor shaft.
For field windings, place one lead on a field terminal and the other on the frame. Test each lead separately.
Read the resistance value. For most motors, you want at least 5 MΩ. If the value is low, dry the windings with a heater and retest.
Safety Alert: Always isolate the circuit and confirm no voltage is present before starting a megger test. High voltage can be dangerous.
Industry standards recommend temperature compensation for accurate readings. Insulation resistance drops with higher temperatures. If you get a low reading, do not run the motor until you fix the problem.
Functional and Load Test
After electrical checks, you need to test the dc motor under real conditions. This step shows how the motor performs when running and carrying a load.
Remove all safety tags and set the control mode to LOCAL or REMOTE as needed.
Rack in the feeder or breaker and turn on control power.
Start the motor and monitor current, noise, and vibration during startup.
During a no-load run, record starting current, time, and voltage across the motor at intervals.
Gradually apply load and watch for changes in current, temperature, and vibration.
Measure the temperature of the motor body, bearings, and windings. Make sure they stay within safe limits.
Note: If you notice abnormal warmth, noise, or vibration, stop the test and inspect the motor.
Functional and load tests help you see if the motor can handle its rated workload. A stable current and normal temperature mean the motor is healthy. High current or overheating signals a problem.
Polarity and Brush Check
Polarity and brush checks ensure the motor runs in the correct direction and that the brushes make good contact.
To check polarity, reverse the supply leads and observe the direction of rotation. The motor should reverse smoothly.
Inspect the brushes for wear. Replace them if they are too short or uneven.
Check the spring tension holding the brushes against the commutator. Weak springs can cause sparking or poor contact.
Examine the commutator for pitting or grooves. Clean or resurface if needed.
Tip: Running the motor at or below rated voltage reduces brush and commutator wear.
If you find excessive brush wear or sparking, adjust the brush position or replace the brushes. For polarity checks, if the motor does not reverse or runs erratically, check the wiring and connections.
Table: Common DC Motor Test Procedures and Expected Results
Test Type | Procedure Summary | Expected Result | Abnormal Finding |
|---|---|---|---|
Visual Inspection | Check for damage, wear, contamination | Clean, intact, no damage | Cracks, rust, loose wires |
Multimeter Resistance | Measure winding resistance | Low (few ohms) | High/infinite resistance |
Multimeter Voltage | Measure voltage across the motor | Matches supply voltage | Low or unstable voltage |
Insulation Resistance | Megger test windings to frame | >5 MΩ | <5 MΩ, needs drying/repair |
Functional/Load Test | Run motor, monitor current, temp, vibration | Stable current, normal temp | High current, overheating |
Polarity/Brush Check | Reverse leads, inspect brushes/commutator | Smooth reversal, minimal wear | No reversal, sparking, wear |
DC Drop Test | Measure voltage drop across field coils | ±5% variation from average | Large variation, shorted coil |
Drop Testing Fields | Test field windings for voltage drop | Consistent drop, no shorts | Inconsistent, shorted field |
Impedance Test | Measure winding impedance | Within spec | Out of spec, possible fault |
Callout: Always document your findings and compare them with previous results. This helps you track motor health over time.
By following these steps, you can test a dc motor thoroughly and catch problems early. Combining visual, electrical, and functional tests gives you a complete picture of motor condition. If you find serious issues, consult a professional motor shop for advanced dc motor testing.
Troubleshooting and Results
Interpreting Test Results
You need to interpret your test results with care. Start by comparing your measured values to the manufacturer’s specifications. If you see a higher than normal current during a load test, this often points to winding faults or mechanical binding. Use statistical data to track temperature and current over time. This helps you spot trends and catch problems early. For example, thermal monitoring with infrared thermography lets you see abnormal temperature patterns. If you notice a sudden spike in current or temperature, you should investigate further. Reliable diagnostics use charts and frequency data to make your findings repeatable and clear.
Tip: Always record your current readings at each stage. This practice helps you build a history for each motor and supports better decision-making.
Common Issues and Fixes
You may encounter several common issues during DC motor testing. Here are some typical problems and how you can address them:
High current draw: Check for shorted windings or mechanical friction. Clean and lubricate bearings if needed.
Low insulation resistance: Dry the windings and retest. Replace insulation if the problem continues.
Unstable current: Inspect for loose connections or worn brushes. Tighten terminals and replace brushes as needed.
Abnormal temperature rise: Use statistical temperature data to confirm overheating. Remove dust and improve ventilation.
Noisy operation: Look for misaligned parts or damaged bearings. Realign or replace faulty components.
You can learn from recent troubleshooting case studies. The table below shows how different diagnostic methods help solve real-world problems:
Case Study Title | Diagnostic Method(s) Used | Industry/Application Area | Key Findings/Support for DC Motor Testing |
|---|---|---|---|
Energized Motor Testing Reveals Improper VFD Settings | Energized Motor Testing | Condition Monitoring Solutions | Identified improper VFD settings affecting motor performance |
Proactive Motor Testing Protects Ethanol Plant | Multi-technology approaches | Ethanol Production | Prevented downtime and reduced costs through early fault detection |
Rotor Bar Fault Maintenance Issue: Vibration Sensor Alert | Vibration Analysis | Cement Plant | Detected rotor bar faults via vibration amplitude monitoring |
Motor Bearing Mechanical & Electrical Vibration Testing | Mechanical and Electrical Vibration Testing | Rotating Equipment Maintenance | Assessed bearing condition to prevent failures |
Online Motor Testing with Electrical Signature Analysis | Electrical Signature Analysis (ESA) | Online Motor Condition Monitoring | Captured voltage/current waveforms to detect faults during operation |
Motor Condition Monitoring Reduces Energy Use In Municipal Utility District | Motor Reliability and Power Quality Testing | Municipal Utilities | Reduced energy use and prevented motor failures |
Dynamometer Fault Diagnosed at Automotive Plant | Multi-technology fault diagnosis | Automotive Manufacturing | Diagnosed faults causing significant production losses |
Synchronous Motor Rotor Fault Analysis | Rotor Fault Analysis | Chemical Plant | Identified rotor faults causing motor trips |
Power Plant Uses Electrical Signature Analysis for Performance Assessment | Electrical Signature Analysis (ESA) | Nuclear Power Plant | Assessed pump motor performance and prevented failures |
Generator Phase Unbalance Diagnosed, Saves Company 1M | Electrical Signature Analysis (ESA) | Nuclear Power Plant | Diagnosed phase unbalance preventing costly failures |
When to Repair or Replace
You must decide when to repair or replace a DC motor based on your findings. If you see repeated high current readings, even after cleaning and tightening connections, the windings may have permanent damage. Low insulation resistance that does not improve after drying signals a need for replacement. If you find severe brush wear or commutator damage, replacement is often the safest choice. Use your current and temperature records to guide your decision. When you see a pattern of rising current or frequent overheating, plan for a replacement before a complete failure occurs.
Note: Regular testing and careful tracking of current and temperature help you avoid unexpected breakdowns and costly downtime.
You ensure reliable DC motor operation by following each testing step—visual checks, resistance measurements, insulation tests, and functional runs. Regular testing with a checklist improves accuracy and reduces downtime by up to 50%, as industry experts recommend. Advanced testing tools and real-time monitoring also help you detect faults early and support energy-efficient performance.
Consistent documentation and structured maintenance keep your motors running longer. For complex issues, consult professional resources or seek expert diagnostics.
FAQ
How often should you test a DC motor?
You should test your DC motor every three to six months. If you use the motor in harsh environments or for critical tasks, test it more often. Regular checks help you catch problems early.
What resistance value is normal for DC motor windings?
Most healthy DC motor windings show resistance between 1 and 10 ohms. Always check your motor’s manual for the exact value. If you see a much higher or lower reading, you may have a fault.
Can you test a DC motor without removing it from the machine?
Yes, you can perform basic tests like visual inspection and resistance checks without removing the motor. For insulation or load tests, you may need to disconnect or partially remove the motor for safety.
What should you do if you find low insulation resistance?
Safety Tip:
If you find low insulation resistance, stop using the motor. Dry the windings with a heater or blower. Retest after drying. If the value stays low, replace the insulation or consult a professional.
See Also
How To Maintain Electric Vibration Motors For Longer Life
Effective Solutions For Frequent Problems With 3 Volt Motors
Understanding Motor Brush Diagrams For ERM Vibration Motor Care
Get Custom Micro DC Motors from
INEED Motors!
Leading Brand in Vibration Motor Manufacturing Industry